As social media continues to evolve, so do the features that make it more interactive and engaging. Instagram Reels is one such feature that has taken the platform by storm. With Reels, users can create short, entertaining videos and share them with their followers. However, the process of creating and posting Reels can be challenging, especially if you’re trying to do it from a computer.
Fortunately, there are ways to post Reels from your computer, and in this article, we’ll show you how. Whether you’re a content creator or a business owner looking to increase your online visibility, posting Reels from your computer can help you save time and effort. So, let’s dive in and explore the different methods you can use to post Reels from your computer.
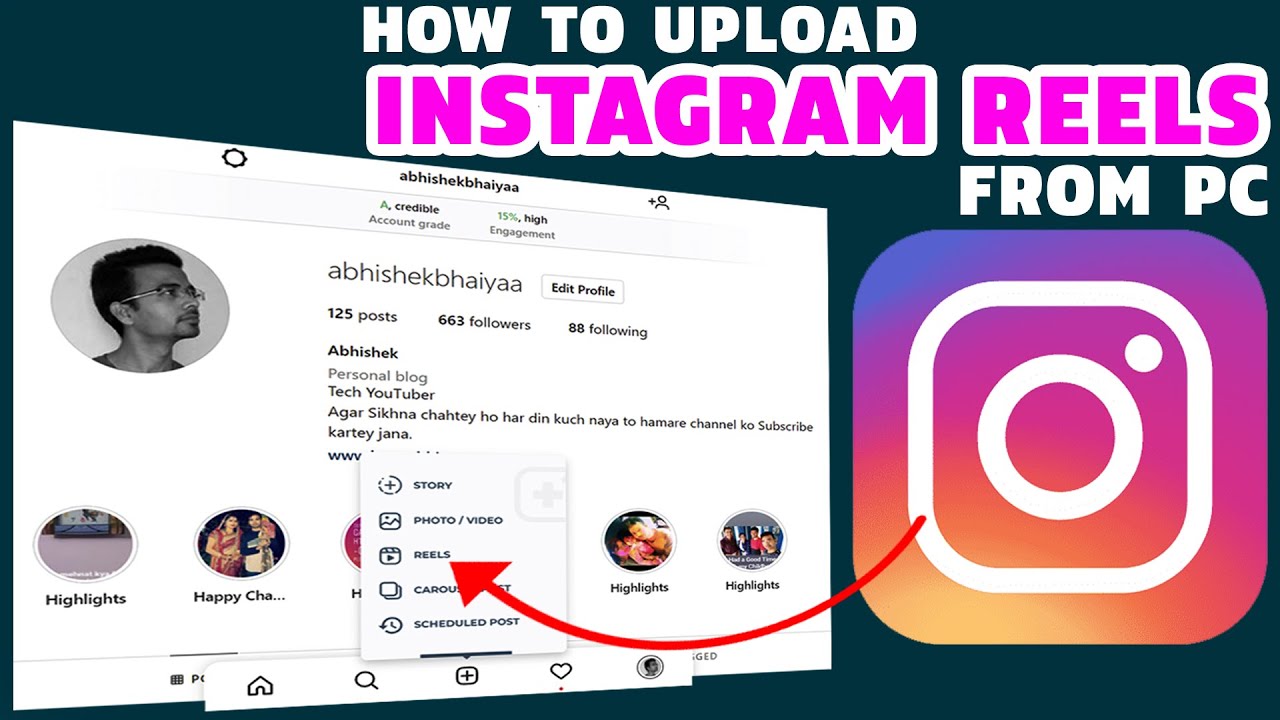
Posting Reels from a Computer
- Open the Instagram app on your computer
- Sign in with your Instagram credentials
- Click ‘Create Post’
- Select ‘Reels’ from the bottom left corner
- Choose an audio track, or upload your own
- Record your video, or upload from your computer
- Add text, effects, and other creative tools
- Click ‘Share’ to post your Reel

Posting Reels from Computer
Posting Reels from a computer is a great way to share your favorite videos and photos with your friends. Reels are a fun way to keep your followers entertained and engaged with your content. In this article, we will discuss how to post Reels from a computer.
Step 1: Download the Instagram App
The first step to posting Reels from a computer is to download the Instagram app. The Instagram app is available for both iOS and Android devices and can be downloaded from the App Store or Google Play Store. Once you’ve downloaded the app, log into your account and navigate to the Reels tab.
Once you’re in the Reels tab, you’ll be able to access all of the Reels you’ve previously posted. You can also create new Reels by selecting the “+” icon in the top-right corner of the screen. This will open a new window where you can select the photos and videos you’d like to create a Reel from.
Step 2: Upload Your Photos and Videos
Once you’ve selected the photos and videos you want to include in your Reel, you’ll need to upload them. To do this, click the “Upload” button and select the files from your computer. You can also drag and drop files directly from your computer into the upload window.
Once your files have been uploaded, you can edit them in the Reels editor. Here, you can add music, text, and stickers to your Reel. You can also adjust the speed and orientation of your clips.
Step 3: Share Your Reel
Once you’ve finished editing your Reel, you can click the “Share” button to post it to your Instagram page. You can also choose to share it as a post or story, as well as with other social media platforms like Twitter and Facebook.
You can also choose to save your Reel as a draft so you can come back and edit it later. To access your drafts, click the “Saved” tab in the Reels editor.
Step 4: Monitor Your Reel’s Performance
Once you’ve shared your Reel, you’ll want to monitor its performance. To do this, open the “Insights” tab in the Reels editor. Here, you can view the number of views, likes, and comments your Reel has received.
You can also see which of your followers have interacted with your Reel, as well as how many times it has been shared. This information can help you understand how your Reel is performing and which areas you may need to adjust.
Frequently Asked Questions
Reels are a great way to share fun moments with friends and family. While many people post reels using their smartphones, it is also possible to post them from a computer. Read on to find out more about how to post reels from a computer.
What Kind of Computer Do I Need?
Most computers are able to post reels from a computer, however, it is important to make sure that the computer has enough processing power and RAM to support the video editing software. Generally, most modern computers should have enough power to post reels from a computer.
What Software Do I Need to Post Reels?
In order to post reels from a computer, you will need to have video editing software installed. There are many different video editing programs available, both free and paid. Some of the more popular software packages include Adobe Premiere Pro, Final Cut Pro, and Sony Vegas Pro.
How Do I Create a Reel?
Once you have the video editing software installed, you can begin creating your reel. The process will vary depending on the software you are using, but in general, you will need to import the video clips you want to use into the software, arrange them in the order you want them to appear, add any effects or transitions, and then export the finished video.
How Do I Post the Reel?
Once you have finished creating the reel, you can then upload it to your reel account. Depending on the size of the video, this process can take some time. Once the video has been uploaded, you can then share it with your friends and family.
Are There Any Limitations?
Yes, there are some limitations when it comes to posting reels from a computer. For example, you may be limited in terms of the length of the video, as well as the resolution of the video. Additionally, you may also be limited in terms of the types of effects and transitions that you can add to the video. It is important to check the terms and conditions of your video editing software to find out what limitations may apply.
How To POST Instagram REELS From PC (FREE)
In conclusion, posting reels from your computer is a great way to expand your content creation capabilities and reach a wider audience. With the simple steps outlined above, you can easily create and post reels from your computer without any hassle. Remember to use high-quality video footage, engaging captions, and relevant hashtags to make your reels stand out.
Furthermore, posting reels from your computer is also a great way to showcase your creativity and connect with your followers on a deeper level. With the ability to edit your videos and add special effects, you can create stunning content that will leave a lasting impression on your audience. So, don’t be afraid to experiment and try new things when posting reels from your computer. With a little bit of practice and creativity, you can take your content creation to the next level and establish yourself as a professional in your field.