FLUX has been making waves on the internet recently, and for good reason. It has proven to be superior to models like DALLE 3, Ideogram, and Stable Diffusion 3. As more popular Image Generation tools like Stable Diffusion Web UI Forge and ComyUI incorporate the capability to use FLUX models, its presence in the Stable Diffusion space is only expected to grow.
Since its release, there have been significant advancements in user workflow. The introduction of the first LoRA (Low Rank Adaptation models) and ControlNet models has enhanced guidance capabilities. These models allow users to provide direction for text guidance and object placement.
In this article, we explore a methodology for training our own LoRA using custom data from AI Toolkit. Developed by Jared Burkett, this repository offers a streamlined way to quickly fine-tune either FLUX schnell or dev. Follow the steps outlined here to train your own LoRA with FLUX.
Bring this project to life
Setting up the H100
How to create a new machine on the Paperspace Console
To begin, it is recommended to use a powerful GPU or Multi-GPU setup on DigitalOcean by Paperspace. Create a new H100 or multi-way A100/H100 Machine by accessing the Gradient/Core button in the top left of the Paperspace console and switching to Core. Click on the create machine button on the far right.
Ensure to select the appropriate GPU and template, specifically ML-In-A-Box, which comes with most of the necessary packages pre-installed. Choose a machine with ample storage (more than 250 GB) to avoid potential memory issues after model training.
Once the machine setup is complete, initiate the machine and access it either through the Desktop stream in your browser or by SSH from your local machine.
Data Preparation
With the setup complete, it’s time to load all the data for training. Select distinctive subjects in images or cameras that are easily accessible. This could be a style or a specific object/person.
For instance, training on the author’s face involved taking around 30 selfies from different angles and distances using a high-quality camera. These images were cropped square, renamed accordingly, and captions were automatically generated for each image using Florence-2.
The data should be organized in the following format within its directory:
---|

  Your Image Directory

   |

------- img1.png

------- img1.txt

------- img2.png

------- img2.txt

...
The images and text files must follow the same naming convention
To automate labeling, adapt the provided code snippet to run on your image folder. After running this code, captioned text files will be saved corresponding to the images, preparing you to start with the AI Toolkit.
Setting up the training loop
Based on the Ostris repo, AI Toolkit provides a training script, run.py, which manages the complexities of training a FLUX.1 model.
The script allows fine-tuning of either a schnell or dev model, with a recommendation to train the dev model for its superior capabilities in prompt understanding, spelling, and object composition. The configuration file train_lora_flux_24gb.yaml is edited to set various training parameters.
Bring this project to life
Configuring the training loop
The training script run.py uses a yaml configuration file to specify training parameters for the FLUX.1 model.
Key settings to adjust include the name, path to the image directory, image dimensions, prompts, batch size, training steps, and model selection between dev and schnell. Fine-tune these parameters to align the trainer with your images and requirements for training the FLUX.1 model.
Running the FLUX.1 Training Loop
To initiate the training process, execute the run.py script with the specified configuration file.
After training with 60 images for 2500 steps on a single H100, the LoRA file and checkpoints are saved in the designated output directory.
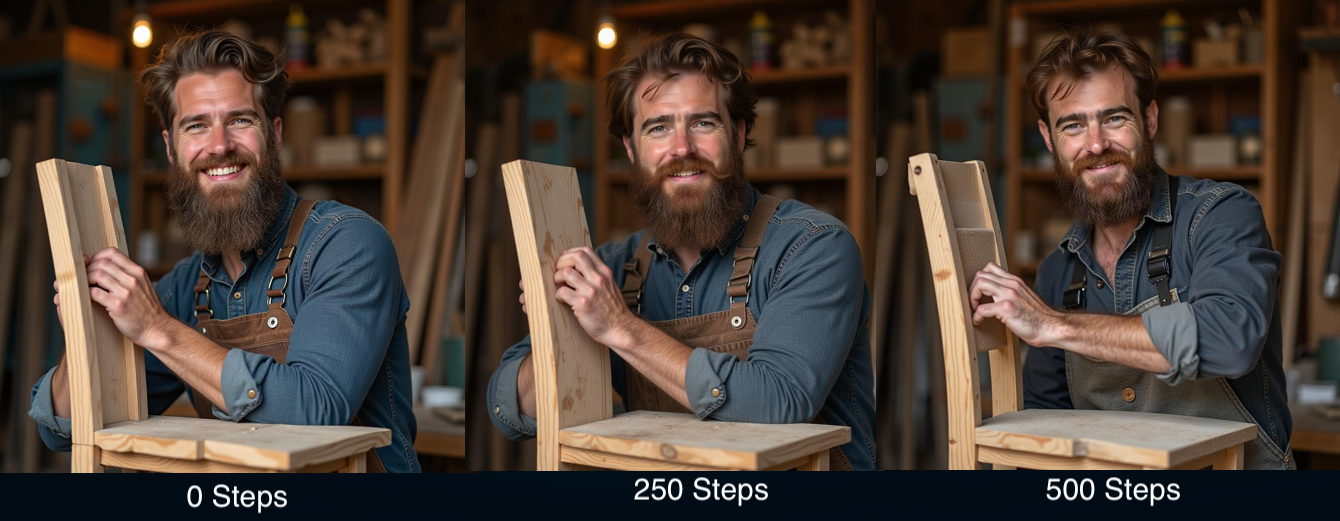
The output directory contains samples generated by the model based on the prompts in the configuration file, providing insights into the training progress.
Inference with our new FLUX.1 LoRA
Once the model is trained, utilize the LoRA to adjust FLUX.1 outputs. An inference script is available in the Notebook for this purpose.
By fine-tuning on the author’s face for 500 steps, a highly accurate recreation of their features was achieved, demonstrating the effectiveness of LoRA training.

This approach can be applied to various subjects, objects, concepts, or styles for LoRA training. Experiment with diverse images to capture subjects/styles effectively, similar to Stable Diffusion.
Closing Thoughts
FLUX.1 represents a significant advancement in image generation and is rapidly gaining popularity for various art tasks. This tutorial has demonstrated how to train custom LoRAs using GPUs on the cloud with AI Toolkit.
Stay tuned for more FLUX.1 blog posts in the future!