Are you tired of constantly having to plug your printer into your computer every time you need to print something? Do you want the convenience of being able to print from any device in your home without having to physically connect to your printer? If so, you’re in luck! Connecting your Brother printer to your wireless network is a simple and straightforward process that will save you time and hassle.
Whether you’re using a Windows or Mac computer, the steps to connect your Brother printer to your wireless network are similar. In the following paragraphs, we’ll guide you through the process step by step, so you can start printing wirelessly in no time. So, grab your Brother printer and let’s get started!
Connecting Brother Printer to Wireless Network
- Turn on your Brother printer and press the Menu button.
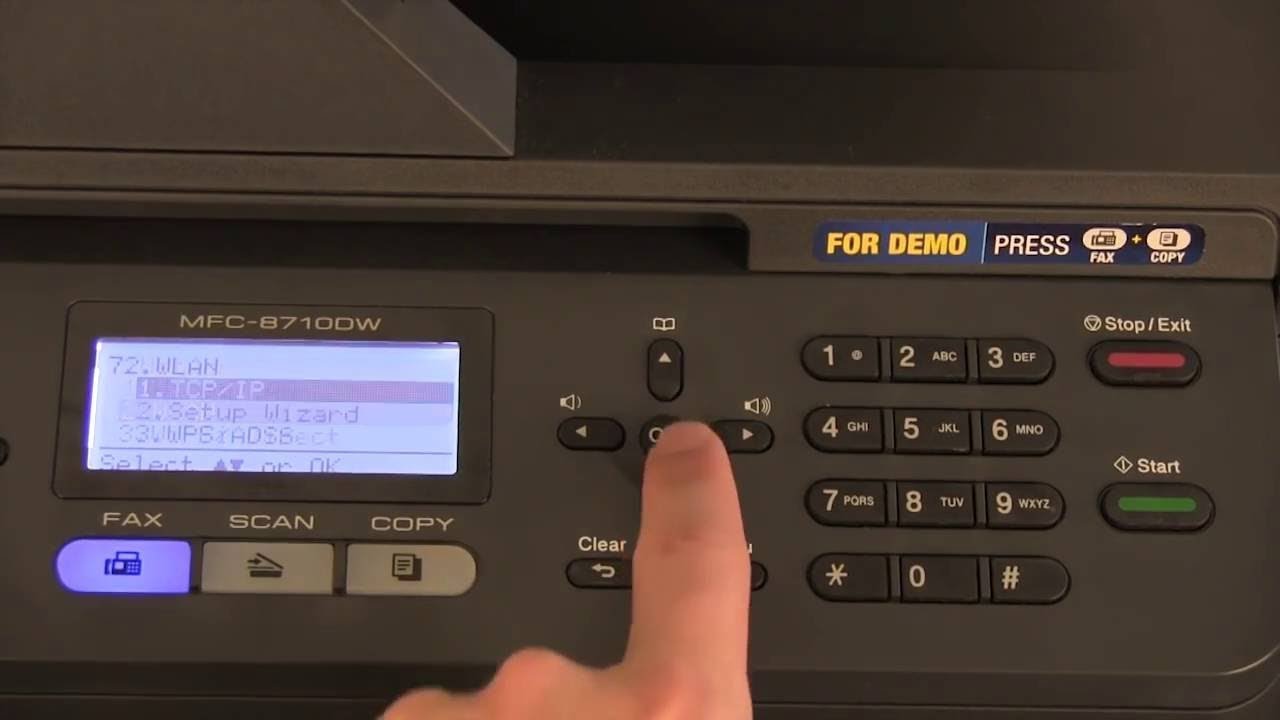
- Go to Network and select WLAN.
- Choose Setup Wizard and press OK.
- Select your wireless network name and press OK.
- Type in your wireless network password and press OK.
- Wait for the printer to finish connecting and press OK.
- Your Brother printer is now connected to your wireless network.
How to Connect My Brother Printer to My Wireless Network
When you need to print documents, photos and other items from your laptop, tablet or smartphone, you need to connect to a wireless network. Brother printers allow you to connect to your home or office network quickly and easily. This guide will show you how to connect your Brother printer to your wireless network in a few simple steps.
Step 1: Connect the Printer to the Network
The first step is to connect your printer to the wireless network. To do this, you will need to turn on the printer and then press the menu button. You will then need to select the network settings menu. On the network settings menu, select the wireless setup wizard option. This will allow you to choose your wireless network. Once you have selected the network, you will need to enter the password. Once you have entered the password, the printer will connect to the wireless network.
Once the printer has connected to the wireless network, you will need to press the OK button to confirm the connection. The printer will then display a message to let you know that it is now connected to the wireless network.
Step 2: Install the Printer Software
The next step is to install the printer software. Depending on the type of printer you have, you may need to download the software from the Brother website. Once you have downloaded the software, you will need to install it on your computer. Once the software is installed, you will be able to connect the printer to the wireless network.
To connect the printer to the wireless network, you will need to open the printer software and select the wireless setup option. This will allow you to select the wireless network that you want to connect to. Once you have selected the network, you will need to enter the password. Once you have entered the password, the printer will be connected to the network.
Step 3: Print a Test Document
The final step is to print a test document. This will allow you to make sure that the printer is connected to the wireless network correctly. To do this, you will need to open the document that you want to print and then select the print option. Once you have selected the print option, you will be able to select the printer that you want to use. Once you have selected the printer, you will be able to print the document.
Once the document has been printed, you will be able to check that the printer is connected correctly. If you are able to print the document correctly, then the printer is connected correctly and you are ready to start printing.
Frequently Asked Questions
Below are some commonly asked questions about connecting a Brother printer to a wireless network.
How do I connect my Brother printer to my wireless network?
In order to connect your Brother printer to your wireless network, you will need to make sure that your printer is compatible with your wireless router and your network settings. You will also need to make sure that your printer is connected to a power source and powered on. Once these requirements are met, you will need to access the printer’s setup menu and use the appropriate connection method to connect to your wireless network. This will typically involve entering the SSID and password for your wireless router. Once the connection is established, you should be able to print wirelessly from your computer or other compatible devices.
What do I need to do to prepare my Brother printer for a wireless connection?
Before attempting to connect your Brother printer to your wireless network, you should make sure that your printer is compatible with your router and your network settings. You should also make sure that your printer is powered on and connected to a power source. Additionally, you may need to install any necessary software or drivers on your computer in order to be able to print wirelessly. Once all of the necessary requirements have been met, you should be ready to connect your printer to your wireless network.
How do I access the setup menu on my Brother printer?
Accessing the setup menu on your Brother printer will depend on the specific model of printer you have. Generally, you will need to press the Menu button and then navigate to the Setup or Network menu. From there, you should be able to find the option to connect to a wireless network. If you cannot find this option, you may need to refer to the user manual for your specific model of printer.
What information do I need to connect my Brother printer to my wireless network?
In order to connect your Brother printer to your wireless network, you will need the SSID and password for your wireless router. This information can typically be found on the side or bottom of your router. Once you have this information, you will need to enter it into the setup menu of your printer in order to establish a connection.
What should I do if I am unable to connect my Brother printer to my wireless network?
If you are unable to connect your Brother printer to your wireless network, you should first check to make sure that your printer is compatible with your router and network settings. You should also make sure that your printer is powered on and connected to a power source. If the issue persists, you may need to reset your router or check the connection settings on your printer. If the issue still persists, you may need to contact your internet service provider or Brother printer support for assistance.
In conclusion, connecting your Brother printer to your wireless network can be a simple and straightforward process. By following the steps outlined in this guide, you can easily connect your printer to your wireless network and start printing wirelessly. It’s important to remember that the exact steps may vary depending on your specific printer model and wireless network setup. If you encounter any issues or have any questions, consult your printer’s user manual or reach out to Brother’s customer support for assistance.
Overall, wireless printing offers a convenient and efficient way to print from anywhere in your home or office. With the ability to print from multiple devices and without the need for cumbersome cables, wireless printing can save you time and hassle. By successfully connecting your Brother printer to your wireless network, you can enjoy the benefits of wireless printing and streamline your printing process.